If you liked this post, join my Collectors List...
Get thoughtful reflections, behind-the-scenes studio news, exclusive offers and early access to new artworks.
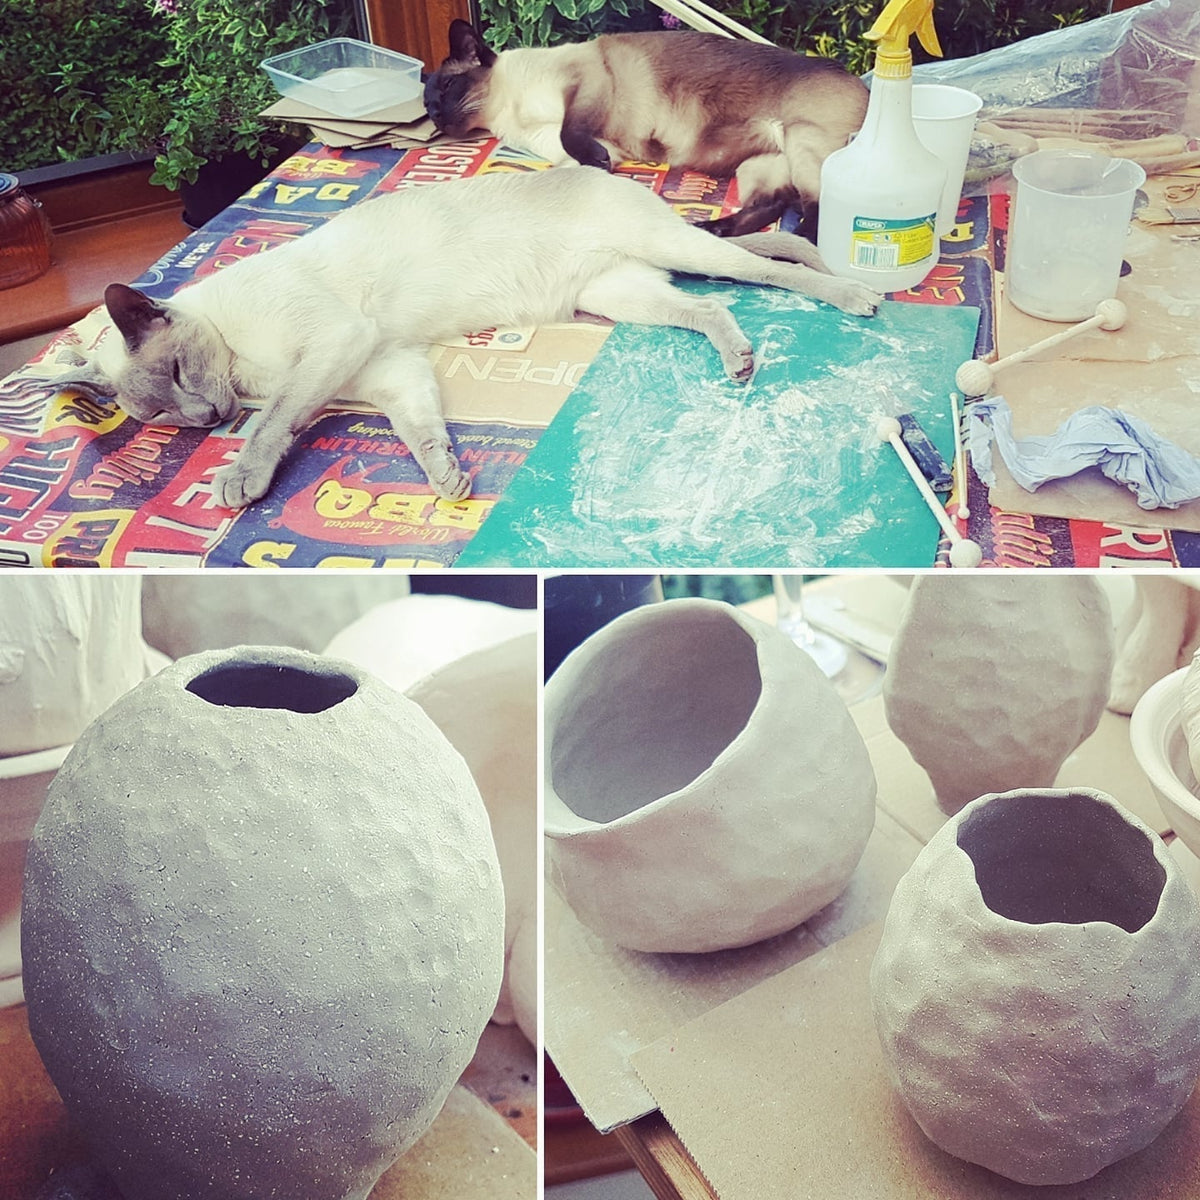
After a brilliant day hand building, making pinch pots and—the best bit—throwing on the wheel, we wended our way home, heads reeling with all the new stuff we'd learned. We were tired, covered in splatters, but very happy—and we had some lovely 'characterful' (wonky) pots to fire. I felt like I'd finished school with some artwork to bring home and show my mum!
Fast forward a few months to May, and after a few further adventures in procuring a kiln (one that involved a day round-trip to Edinburgh, a whole other story), we finally had our first EVER firing session!
The first firing (bisque or biscuit) is the process that takes the soft clay in its raw, squishable state, and turns it into proper ceramic. Although it does stay porous (until you seal or glaze it), after firing it won't disintegrate back into clay 'mud' if you add water to it. We used an earthenware clay for our pots, which is fired at lower temperatures than say, porcelain or stoneware. The heating process during the bisque firing needs to be quite slow - to avoid any moisture trapped in the clay from turning to steam, expanding, and shattering the pots.
So for the magic (I know, I know—it's science, not bloody magic) to take place, the kiln had to be heated slowly (this is called ramping) at a rate of:
The kiln then sits at a constant temperature (called the soak) for 20 minutes, before slowly cooling back down to eventually finish the firing around 12 hours later. See the graph just in the gallery below that explains the ramp and soak process:

Bisque Firing Graph

Fired pots in the kiln
We set the kiln up, carefully stacking the pots on bats (shelves) with spacers between to support the next one on top. We closed everything up, switched the power on, and toasted the kiln with some of our homemade sloe gin before going to bed feeling like it was Christmas Eve—buzzing with anticipation.
Waking up early the next day to a bright, May morning, we excitedly checked on the kiln. The kiln gods were evidently smiling on us, because despite being complete and utter amateurs, we managed to get all our pots fired intact—no blowouts or cracks!
Completely beginner's luck, I suspect—although the pots had plenty of time to dry out before they were fired (only 5 months!). I'm still pretty amazed though, considering the other half managed to squeeze and shape and fold, and rip bits off his pots to play with the behaviour of the clay—and I'd created some 'interesting' experimental shapes to make up for my complete technical ineptitude.
We both ended the day feeling pretty proud of ourselves and hungry for more. Completely bitten by the bug, we decided to build some more pots to add to the collection, and then the next stage was to pick some colours and finishes and get busy glazing our creations. I'll tell more about our pottery adventures in the next blog...
The Potters Barn is near Sandbach, Cheshire - https://www.thepottersbarn.co.uk/
All images and text © 2018 Julia Brown
Get thoughtful reflections, behind-the-scenes studio news, exclusive offers and early access to new artworks.


