If you liked this post, join my Collectors List...
Get thoughtful reflections, behind-the-scenes studio news, exclusive offers and early access to new artworks.
The adventures continue here. The pretty logical next step in this whole thing was glazing our (surprisingly intact) bisque-fired pots. Here's a blow-by-blow account of our mammoth glazing weekend - so if you're trying it for the first time you can get some tips. And if you have absolutely no intention of ever going near ceramics and you're just wondering why on earth I am, you can just read it and chuckle to yourself.
Ceramic glazes have been around for at least 2000 years (originating from China and the Middle East), and apart from any decoration, they seal porous bisque-fired ceramic ware and make the surface tougher—so it can withstand use and hold liquids. Like wine. Mmmm, wine.
There are literally thousands of ceramic glazes available to buy. Apart from the many different suppliers and brands, there's a rainbow of different colours, textures, effects and firing temperature ranges.
Some have high gloss, some are matt or satin finish.
Others give amazing reflective metallic finishes, contain speckles, or reveal spectacular colours when the particles in them melt and fuse into the rest of the molten glaze on firing.
The list is endless. And you can even make your own (which we intend on doing when we get a bit more experienced). Yet again, my A Level in Chemistry will come in handy in an artistic application (don't let anyone ever tell you art and science have nothing to do with each other—it's bollocks).
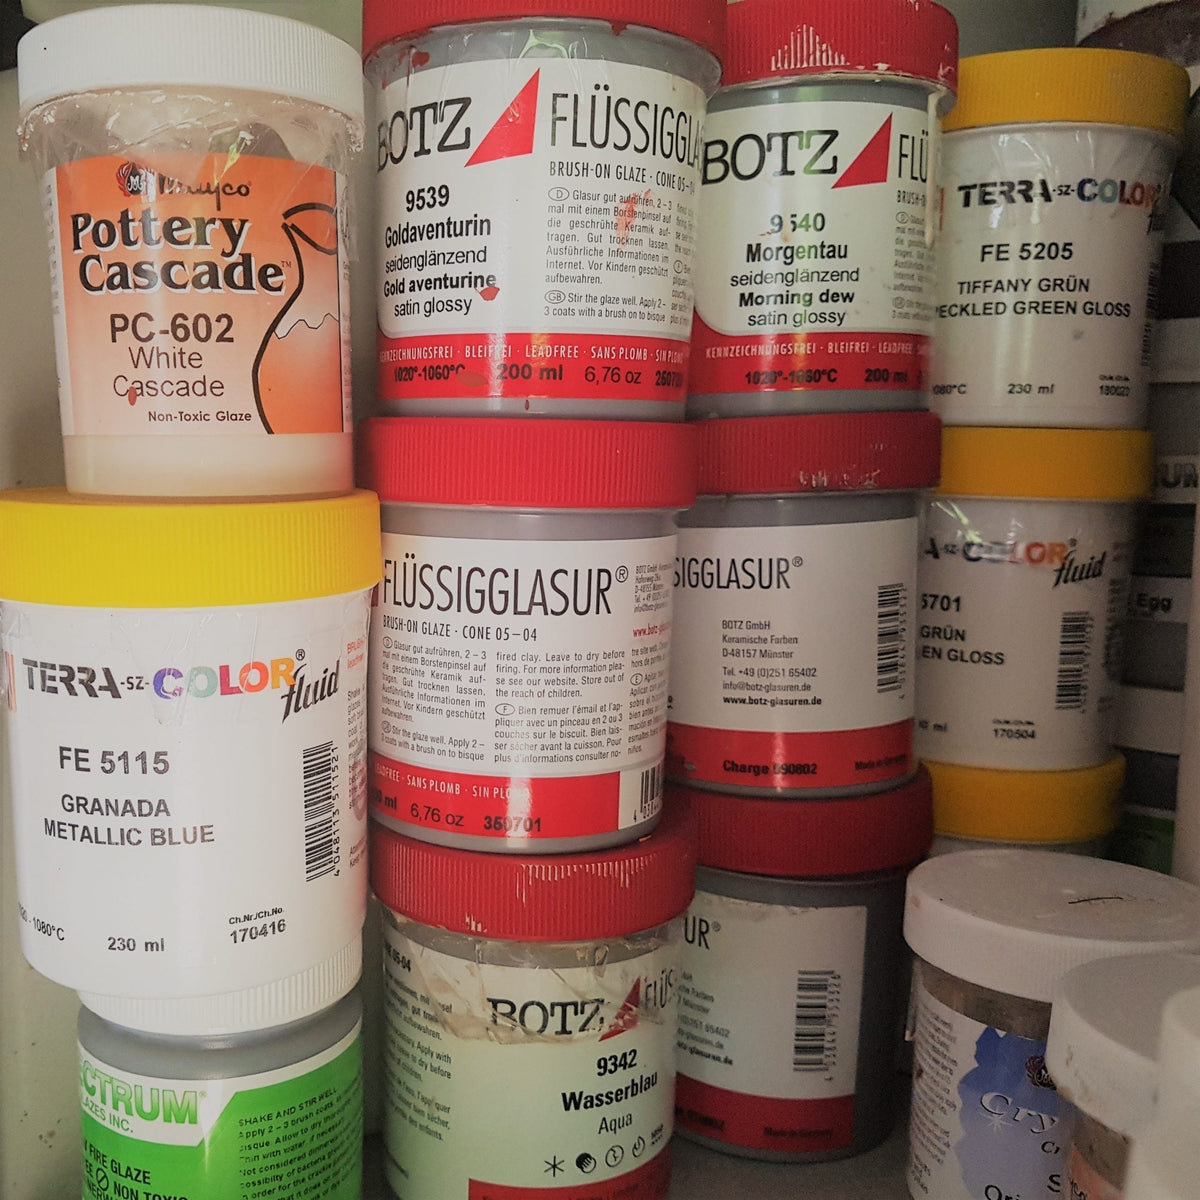
When you're dealing with larger quantities, it's way more efficient and cost-effective to buy powder glazes and mix them up yourself with water, but you can buy pre-mixed 'brush on' glazes—which means they're already in liquid form in a pot, and just need mixing and applying. We decided for the time being it would be easier to plump for the brush on glazes, just to get used to using them—and to get an idea of the colours and textures we preferred—or that worked for us. So with the massive choice out there, we had a big job on our hands choosing what glazes to use on our lovingly crafted pots.
Starting with a bit of logic and to immediately narrow it down, we knew that we needed earthenware glazes, so they would fire correctly with our pots. Secondly, we (I say 'we', but it was Damon who did a shitload of research here) nailed it down further to a few brands that had a good reputation for ease of use and reliable results (even for bumbling novices like us). We went for Spectrum, Terra-Colour and Botz glazes. Then we chose colours! And, amazingly, we both agreed about the palette of colours we wanted to use straight away. In normal life, this never happens (cue the music from The Twilight Zone).
From the colour choices we made, we worked out glazes that all had a similar firing temperature range (in this case 1020-1060°C) for 2 reasons:
We narrowed everything down to a shortlist. The shortlist—we realised when all the glazes turned up—was actually quite a long list. We'd gone a bit mad in our enthusiasm and ordered a shedload. Not daunted in the slightest, we got stuck into Glazefest! An entire weekend of glazing pots! Accompanied by hot sunshine, 3 cats and some inspiring tunes.

Air Dried Clay Flat Dish

Raw Clay Pot Air Drying

A Motley Bisque-Fired Pot Collection
You can obviously jump straight in and get glazing (also depending on what sort of ceramic work you're doing), but for the sake of good practice, it's worth prepping your bisque fired ceramics before you start splodging the glazes onto your pots—so we did.
So, armed with some clean soft brushes of varying sizes, some stirring sticks and some clean old rags/cloths, sponges, and a tub of clean water, we got stuck in.
You basically apply a good 2-3 coats of glaze to a pot, letting each one dry before adding another. It's worth having a few pots on the go (so you can rotate what you're working on while another is drying out), or a lot of patience and something else to do between coats drying. The glaze needs to go on in even stroke—if you apply it by brush—or you can dip it, or pour the glaze into the pot and swill it around evenly to coat the inside, before carefully pouring the excess out. You can build up layers of different glazes so they melt on firing and run into each other, or keep it simple and stick to one colour. There are loads of techniques for decoration—and experimenting with them is going to be another really fun and fascinating aspect of our journey in learning ceramics—but on this occasion, we both stuck to the above, keen to see the results. Using glazes is quite counter-intuitive to begin with, because many of the them only show their true colours when they're fired. In raw form, they're completely different. For example, in our electric kiln (which fires with oxidation—i.e. oxygen stays present the kiln as the firing process happens) a vile opaque bubblegum-pink colour glaze transforms into a fantastic vibrant red, and a sludgy-sage-green-grey colour becomes a stunning transparent deep-sea-blue on firing. So you have to visualise how you'd eventually like your pot to look, while painting it with completely different looking colours. In my obsession with lists and all things laminated, I'd made (you've guessed it) a laminated list of the glazes along with their sample photographs, so we could see what the hell we were using.
Tired, happy and all glazed out, on Sunday afternoon Damon carefully loaded the touch dry pots into the kiln—on prepped shelves to stop them sticking—and set the second firing going. This was definitely more exciting than the bisque firing. Even with the manufacturers guidelines and following advice carefully, there are still shitloads of variables that will influence how glazes can turn out post-firing:
So we didn't know what we were going to get. It could be amazing, it could be a complete fail. Even though the glaze firing is a shorter firing process than the bisque firing, it still takes aaages (a good 8 hours or so) for the kiln to cool down enough for you to peek inside. And if you try and open it too soon, you can shock the pots inside with the cooler air rushing in and cause cracking and faults. So we were on major tenterhooks waiting for the results. But here they are (just click on the video below)—our first glaze firing! We did apply enough singular glazes to get some good solid results, comparable with the manufacturers guidelines. So that was a bonus, because at least we'd done something right! It was fantastic to see our pots emerge from the kiln with recognisable colours and finishes—each one like some sort of little treasure, shaped by heat and chemistry. And we got some fascinating mingled results from using different glazes together—so our creative souls were happy.

After the glaze firing! From vile bubblegum-pink to a luscious red

The Final Results! Our first ever glazed pot collection

Glazed Flat Dish: Not perfect results—the glaze has melted and run slightly

More Wonky Pots
It being our first time glazing—filled with enthusiasm and having all these ace glaze colours available to us—we did go a bit magpie* and chucked the kitchen sink at things. In hindsight, we should have been a bit more methodical (and kept a notebook of what we were doing!) as there were some quite bonkers results and some glazes that didn't work as well as others. But it was so much fun to do, and we've now got something to build on and refine. So, lesson learned for next time:
We've also decided to pare back the amount of glazes for the time being, and get used to getting stable and identifiable results from the ones we like best. Test and measure, baby! So there you have it—the enthusiastic idiot's guide to glazing pots. It just goes to show that we all have to start somewhere, and the most important thing is we'll learn from this and get better. And have a massive amount of fun at the same time.
*Well documented lovers of bright shiny things. Also see Niffler.
All images and text © 2018 Julia Brown
Updated January 2024
Get thoughtful reflections, behind-the-scenes studio news, exclusive offers and early access to new artworks.


